Version v0.36 of Metabase is no longer supported. Check out the docs for the current stable version, Metabase v0.63.
Covered in this guide:
The Metabase team runs a number of production installations on AWS using Elastic Beanstalk and currently recommend it as the preferred choice for production deployments. Below is a detailed guide to installing Metabase on Elastic Beanstalk.
Metabase provides a pre-configured Elastic Beanstalk launch URL to help you get started with new installations. If you are starting fresh we recommend you follow this link in a new tab to begin creating the Elastic Beanstalk deployment with a few choices pre-filled. Then just follow the step-by-step instructions below to complete your installation.
Launch Metabase on Elastic Beanstalk
After clicking the launch URL, you should see a screen that looks like this:
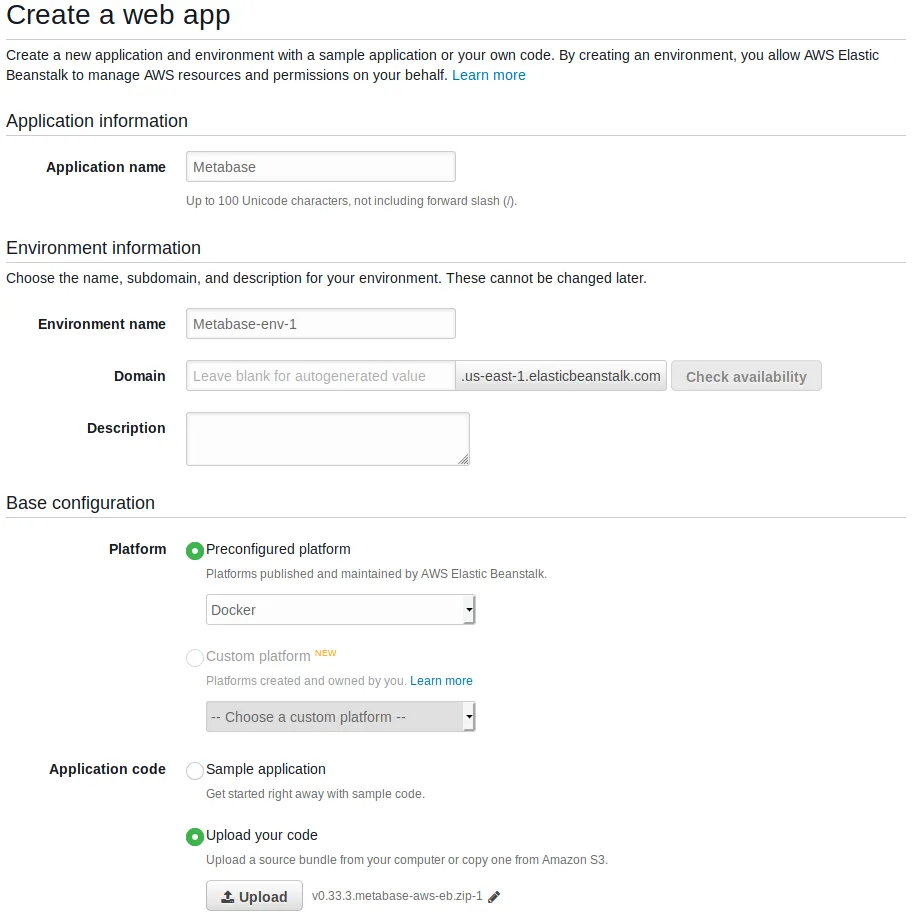
NOTE: If this screenshot doesn’t match what you see in the Elastic Beanstalk console, it’s likely that you are on an old version of the Elastic Beanstalk UI. At the time of writing this documentation, both versions of the UI are being reported in the wild. If you need to, you can view our older AWS EB documentation.
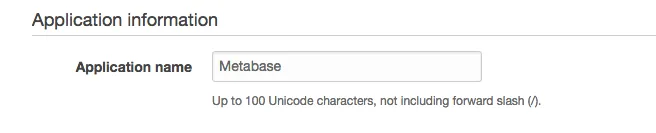
Elastic Beanstalk is organized into Applications and Environments, so to get started we need to create a new application. You can customize the application name here.
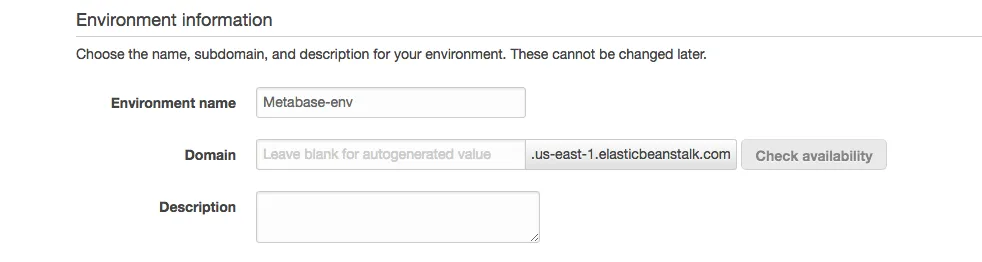
Here’s where you can pick the environment name and the domain URL that you want to use for your Metabase instance. The environment name is simply the label you’re assigning to this instance of Metabase.
As for the domain URL, Feel free to get creative — just remember that the URL for your Metabase instance must be unique across all AWS Elastic Beanstalk deployments, so you’ll have to pick something that nobody else is already using. We often recommend something like mycompanyname-metabase. If you don’t care about the URL you can simply leave it to whatever Amazon inputs by default. Just be aware that this can’t be changed later.
If you see a Tier setting under Base configuration, leave it set to Web Server. Elastic Beanstalk provides two choices for environments within an application, but Web Server is what we want.

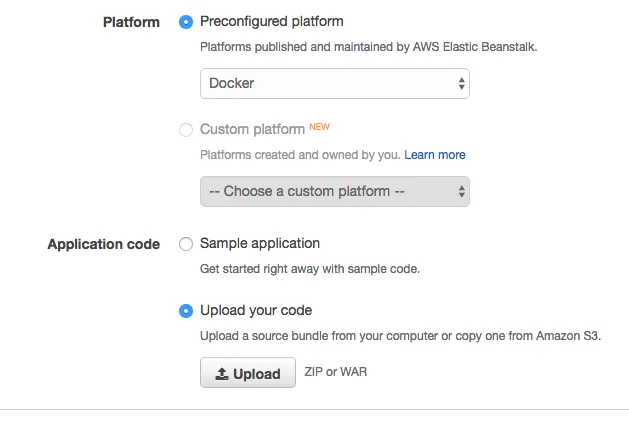
While most of the fields here will be correctly pre-filled by following the launch URL above, you’ll just need to do two things:
Platform is set to Preconfigured platform, with the dropdown set to Docker.Application code setting to Upload your code, then click the Upload button. You’ll see a modal like this: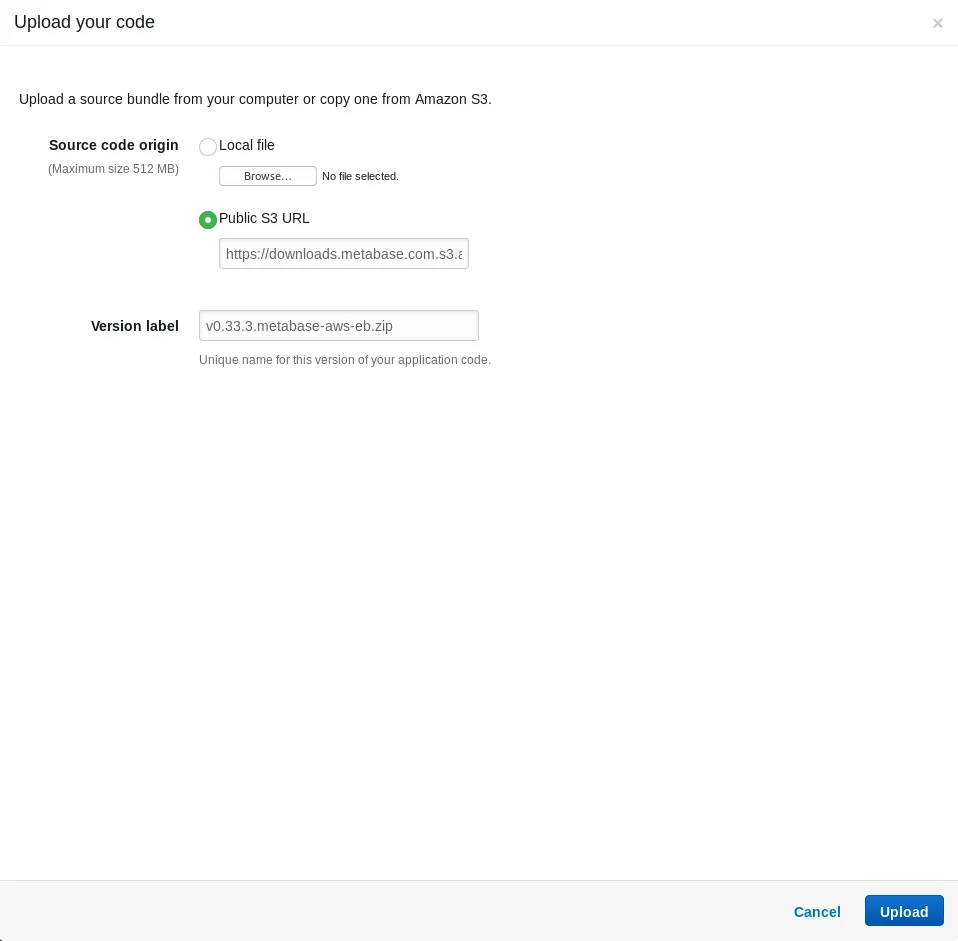
The modal should be pre-populated with the correct settings if you used the quick launch URL at the top of these instructions. All you need to do is push the Upload button in this modal.
These settings will run the Metabase application using Docker under the hood, using the official Metabase Docker image which is published on Dockerhub.
You can now go ahead and click Review and launch.
You will need to enable enhanced health checks for your Beanstalk Monitoring.
Click on the Modify link under the Monitoring section as seen here:
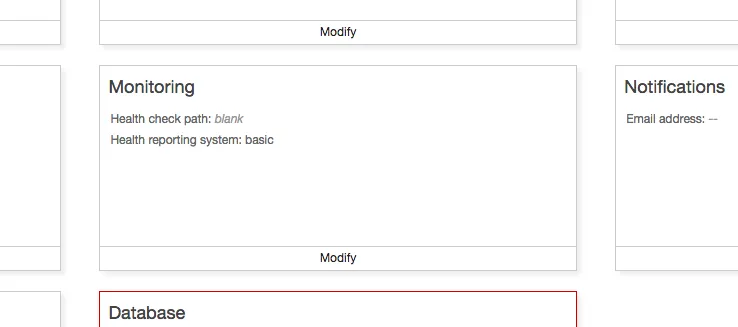
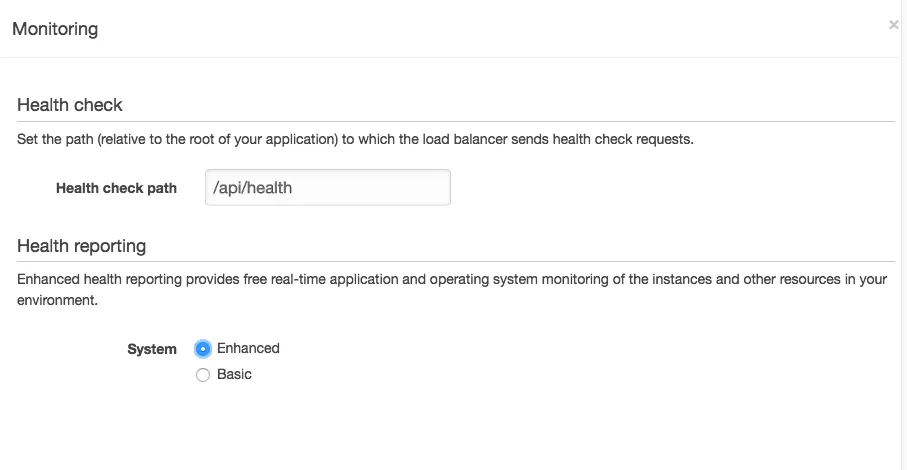
The Health check path is how Elastic Beanstalk knows when the application is ready to run. This path is also used by the Load Balancer to check application heath. Set this path to /api/health.
Then make sure enhanced health checks are enabled. This is a free option, unless you later add specific metrics to CloudWatch.
To run Metabase in a cloud environment of any kind we highly recommend using an independent database server with high availability such as Amazon RDS. So for standard deployments we will choose to create an RDS instance with our Elastic Beanstalk application.
NOTE: It’s possible to skip this step if you wish. However, this will force Metabase to use a local H2 database file on your application server, and there will be no way to backup and maintain that database. When your instance is restarted for any reason you’ll lose all your Metabase data. If you are just doing a quick trial of Metabase that may be okay, but otherwise we recommend against it.
To set the database password from the Beanstalk template look for the Database configuration pane as below. It should have a red outline when you first see this page. Next, click on the Modify link.
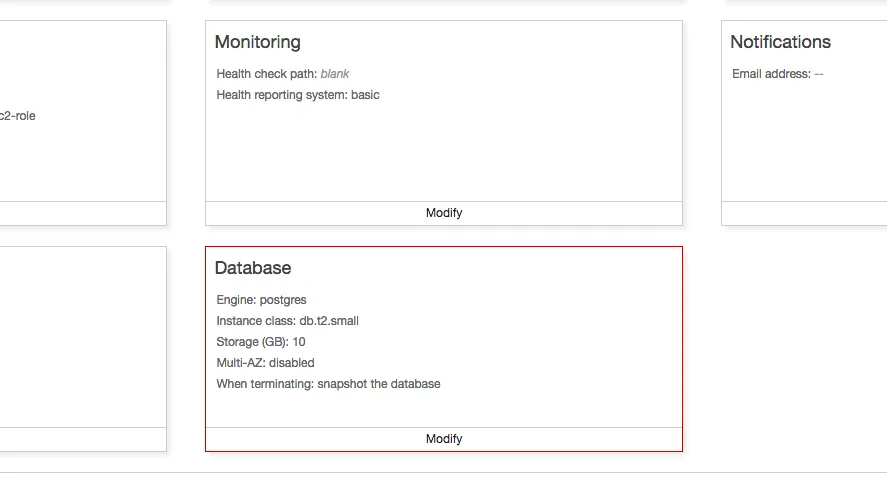
The database settings screen will give you a number of options for your application database. Regarding individual settings, we recommend:
Snapshot should be left as None.Engine should be set to postgres. Metabase also supports MySQL/Maria DB as backing databases, but this guide currently only covers running Metabase on Postgres.Engine version can simply be left on the default, which should be the latest version.Instance class you can choose any size, but we recommend db.t2.small or larger for production installs. Metabase is pretty efficient so there is no need to make this a big instance.Storage to the default size.Username and Password for your database. We suggest you hold onto these credentials in a password manager, as it can be useful for things like backups or troubleshooting. These settings will be automatically made available to your Metabase instance, so you will not need to put them in anywhere manually.Retention setting as Create snapshot.Availability we recommend the default value of Low (one AZ) for most circumstances.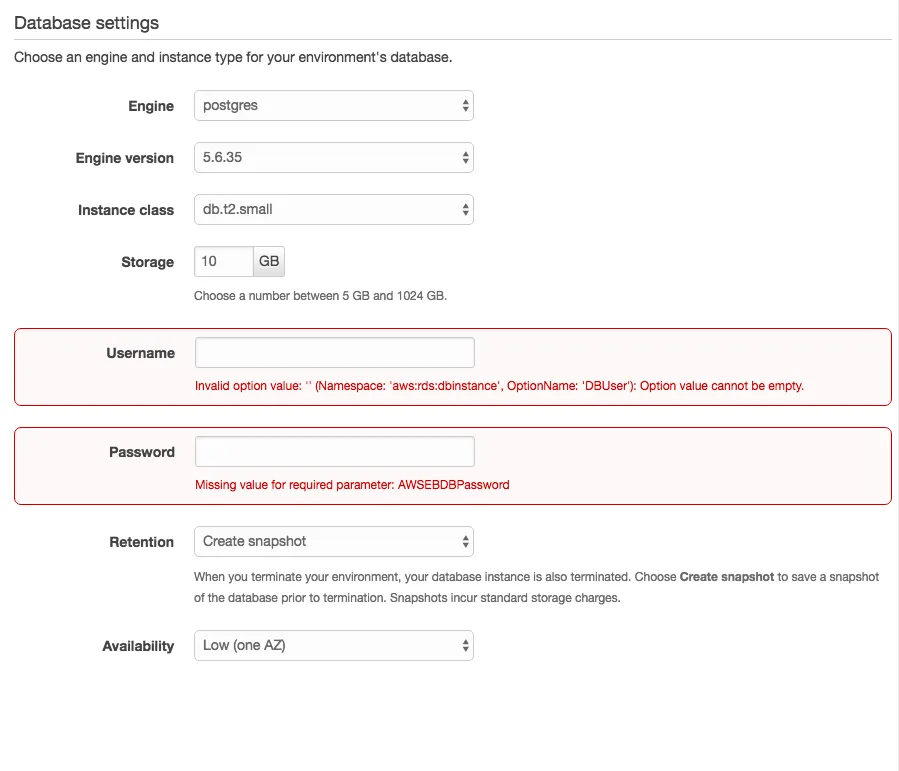
Once you’ve entered a password and clicked Save, the red outline on the Database box should have gone away, indicating that the application is valid and ready to be launched.
Newer AWS accounts are encouraging the use of Virtual Private Cloud (VPC) for deployments, and in general we think it’s simplest to follow that best practice.
If you prefer not to use a VPC, that’s fine. But one thing to note is that some EC2 instance types (t2.* specifically) are not available outside of a VPC, so if you choose to not use a VPC then make sure and pick appropriate instance types.
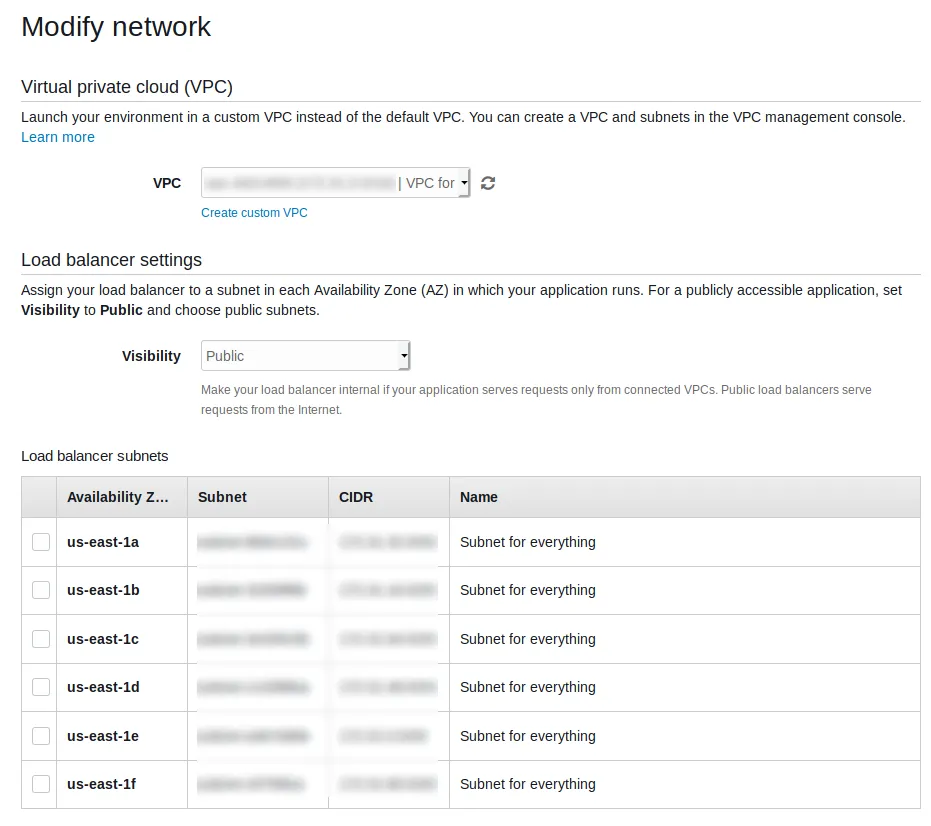
If you are launching your Metabase inside of a VPC you’ll now need to check a few boxes to enable your application to work inside your VPC subnets. Click Modify on this Network box to set things up.
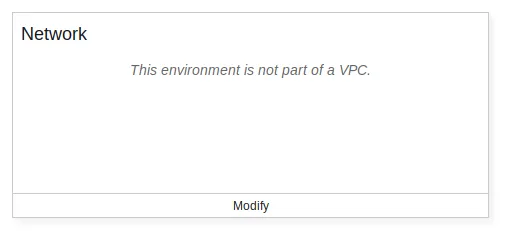
Unless you have a custom VPC setup that you know how to configure, it’s easiest to just check all the boxes under Load balancer settings and Instance settings and allow your infrastructure to exist on all subnets. Note that the Load Balancer cannot be in more than one subnet per availability zone, and the database requires subnets in at least two availability zones. Once you’ve finished your VPC config click Save.
There are many ways to customize your Beanstalk deployment, but commonly modified settings include:
Instance type (Instances block) is for picking the size of AWS instance you want to run. Any size is fine but we recommend t2.small for most uses.
t2.* instance type if you did not check the box to run in a VPC.EC2 key pair (Security block) is only needed if you want to SSH into your instance directly. We recommend leaving this out.Email address (Notifications block) to get notifications about your deployments and changes to your application. This is a very simple way to keep tabs on your Metabase environment, so we recommend putting a valid email in here.If this is your first time creating an application for Elastic Beanstalk then you will be prompted to create a new IAM role for your launched application. We recommend simply leaving these choices to their defaults.
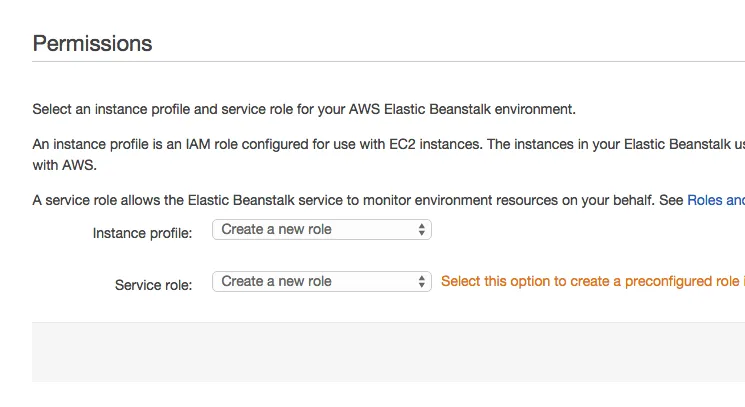
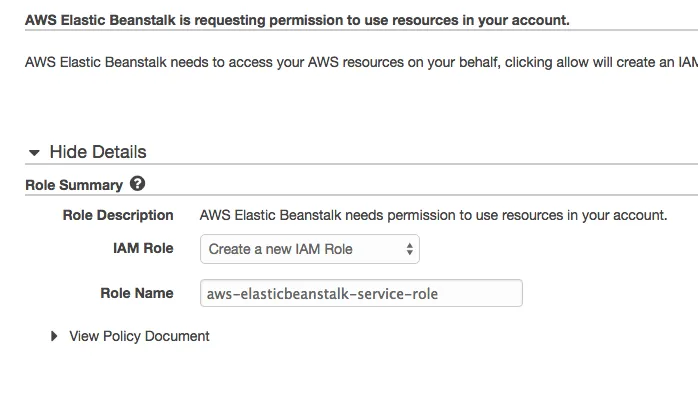
When you click Next a new tab will open in your browser and you will be prompted to create a new IAM role for use with Elastic Beanstalk. Again, just accept the defaults and click Allow at the bottom of the page.
This can take a little while depending on Amazon. It’s not uncommon to see this take 20 to 30 minutes, so feel free to do something else and come back to check on it. What’s happening here is each part of the environment is being provisioned.
When it’s all done you should see something like this:
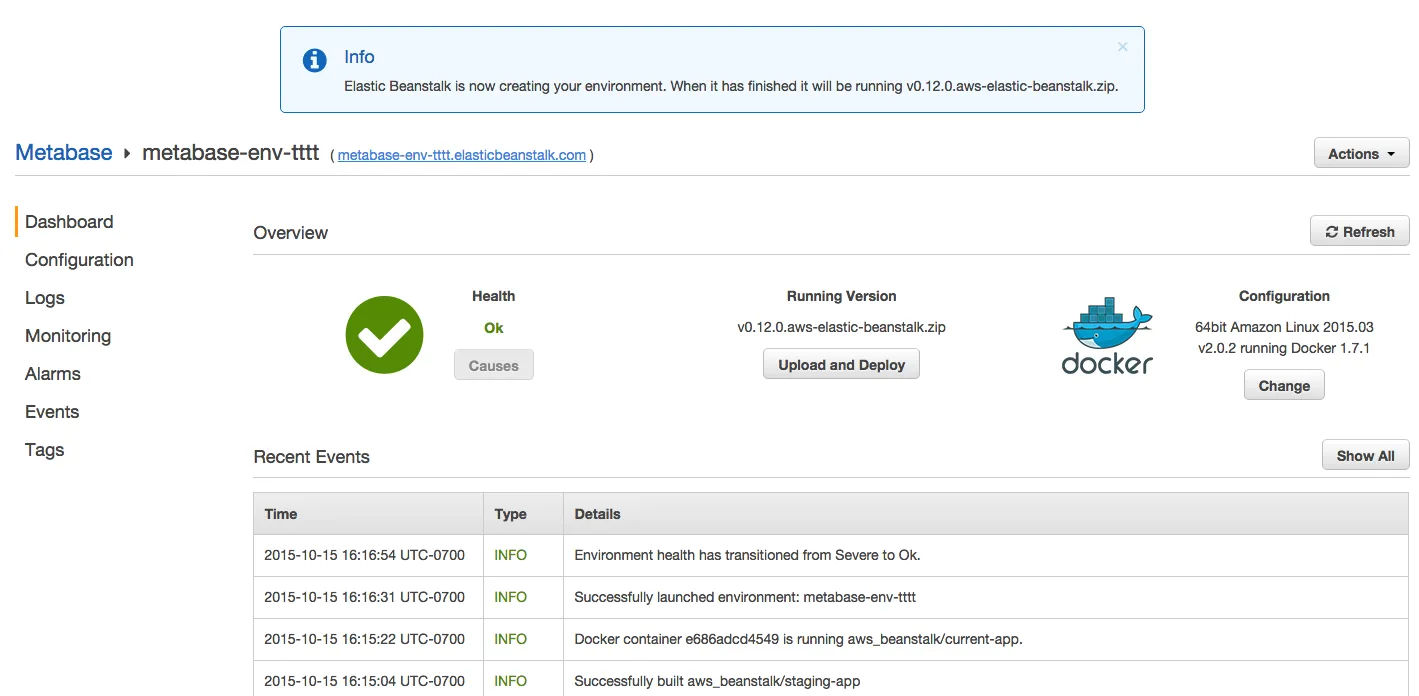
To see your new Metabase instance, simply click on the link in parentheses next to your environment name in the top-left. In this example it’s metabase-env-tttt.elasticbeanstalk.com
Now that you’ve installed Metabase, it’s time to set it up and connect it to your database.
Upgrading to the next version of Metabase is a very simple process where you will grab the latest published Elastic Beanstalk deployment file from Metabase and upload it to your Application Versions listing. From there it’s a couple clicks and you’re upgraded.
Here’s each step:
Metabase application.Application Versions on the left nav (you can also choose Application Versions from the dropdown at the top of the page).Upload button on the upper right side of the listing.Choose File and navigate to the file you just downloaded.Upload button to upload the file.Deploy button in the upper right side of the page.Deploy button to begin the deployment.Once a new version is deployed you can safely delete the old Application Version if desired. We recommend keeping at least one previous version available for a while in case you desire to revert for any reason.
If you want to retain the Metabase application logs you can do so by publishing then to an S3 bucket of your choice. Here’s how:
Configuration link in the navigation bar on the left side. You will be taken to a page with a number of boxes containing different configuration options for your environment.Software Configuration under the heading Web Tier.Enable log file rotation to Amazon S3.Save in the bottom right corner.After you click save your Environment will begin updating with your new change. You will have to wait a minute for this to complete and then you’re good to go. Elastic Beanstalk will now periodically publish the application log files to S3 for you and you can download them and analyze them at your leisure.
This is only relevant if you plan to use HTTPS (recommended) for your Metabase instance on AWS. There is no requirement to do this, but we are sticklers for security and believe you should always be careful with your data.
Sadly there is no option to do this via the AWS Console, so this step must be performed using the AWS CLI client
aws iam upload-server-certificate \
	--server-certificate-name <your-cert-name> \
	--certificate-body file:///path/to/certificate.crt \
	--private-key file:///path/to/private-key.pem
This will create a new certificate inside your AWS environment which can be reused for a variety of things. Remember the name you chose for your certificate because we’ll use that later in the setup process when we enable SSL.
metabase.mycompany.com).mycompany-metabase.elasticbeanstalk.com).Before trying to enable HTTPS support you must upload a server certificate to your AWS account. Instructions above.
Metabase application.Configuration on the left hand sidebar.Load Balancing under the Network Tier section and click the gear icon to edit those settings.Secure listener port to 443.SSL certificate ID, choose the name of the certificate that you uploaded to your account.
Save in the lower right.
*.elasticbeanstalk.com URL provided by Amazon because it will result in a certificate mismatch. To continue accessing your secure Metabase instance you must Setup a DNS CNAME.Once your application is working properly over HTTPS we recommend setting an additional property to force non-HTTPS clients to use the HTTPS endpoint.
Configuration on the left hand sidebar.Software Configuration under the Web Tier section and click the gear icon to edit those settings.Environment Properties add an entry for NGINX_FORCE_SSL with a value of 1.Apply in the lower right, then wait for your application to update.It’s best to set your JVM timezone to match the timezone you’d like all your reports to come in. You can do this by adding the JAVA_TIMEZONE environment variable.
Configuration on the left hand sidebar.Software Configuration under the Web Tier section and click the gear icon to edit those settings.Environment Properties add the following.
JAVA_TIMEZONE with a value such as US/Pacific.Apply in the lower right, then wait for your application to update.This provides a simple way to use the Papertrail logging service for collecting the logs for you Metabase instance in an easy to read location.
Configuration on the left hand sidebar.Software Configuration under the Web Tier section and click the gear icon to edit those settings.Environment Properties add the following entries:
PAPERTRAIL_HOST - provided by PapertrailPAPERTRAIL_PORT - provided by PapertrailPAPERTRAIL_HOSTNAME - the name you want to see showing up in Papertrail for this serverApply in the lower right, then wait for your application to update.NOTE: Sometimes these settings will not apply until you restart your application server, which you can do by either choosing Restart App Server(s) from the Actions dropdown or by deploying the same version again.


